Privacy statement: Your privacy is very important to Us. Our company promises not to disclose your personal information to any external company with out your explicit permission.
Select Language
Nowadays, the way to integrate ceiling decoration has been very popular among people. Even baths in the bathroom of the living room can use this method. Because it is more beautiful than the previous renovation. However, how to install the integrated ceiling Yuba? After a period of use problems, integrated ceiling Yuba disassembly method is what? Interested friends to learn about it together.

1, the installation steps of integrated ceiling Yuba
a, corner line installation
The first is the installation of the collection. To be smooth and firm, first determine the height of the installation and draw a horizontal line. Then, after the tile is attached and horizontal, the matching corner line of the integrated ceiling is tightly fixed on the tile, so that there is no obvious gap.

b. Installation of keel
Then, the distance between the boom and the keel is the same as the panel size. Then, inflate the eye at the top and fix all the suspenders. Note that the lower end of the suspender must be connected with the hook; then the main dragon skeleton should be fixed in the middle of the hook and adjust the height of the nut so that the main keel plane distance from the edge Fasten the plane line on the bar.

c. Installation of gussets
Before installing, remember to wear gloves, not only to protect your hands, but also to ensure its beauty and cleanliness. Then start the installation, fix the template, and use a utility knife and a ruler to characterize it more than three times. Fold the edge and use a pair of scissors to cut it into a 90-degree angle. Then fold it by hand 2-3 times. Then, the stencil cutting port corresponds to the inside of the card keel, and the cutting port face is placed on the edging strip, and the edge band clamping position is pulled out to clamp the stencil, and the triangular hanging piece is clamped with the steel clamp and the main keel to control the stencil. Between the gaps, keep the seam straight.

d. Top cable and buckle panel
Determine where to install lamps, electrical appliances, etc., and arrange the lines in advance. In the end, it is the buckle panel. It can be said that this link is directly related to the overall effect of the ceiling, and it should be both flat and stitched. After that, how to solve the problem of integrated ceiling Yuba disassembly ? Then look at its disassembly method.

2, integrated ceiling Yuba disassembly method
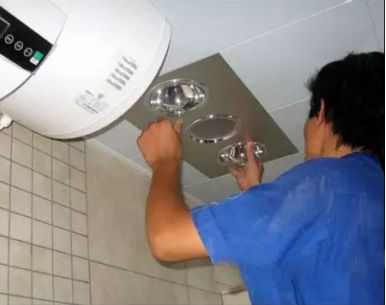
In fact, the method of disassembly and cleaning of the integrated ceiling bath is also very convenient, as long as three small steps: suction, pull, and disassembly. Usually the factory will be equipped with a small tool, as long as a light on the board to collect, suck the air, close to one of the corners, and then pull a hard one, pull the four corners, you can remove the whole board, and Clean the interior.

Xiao Bian concludes: For the integrated ceiling Yuba disassembly method and integrated ceiling Yuba installation steps on the content introduced to this. In fact, it can be seen from the above that the installation, replacement or cleaning of the integrated ceiling bath is not as difficult as it seems. As long as you have mastered a certain skill, you can easily complete it.
Письмо этому поставщику

Privacy statement: Your privacy is very important to Us. Our company promises not to disclose your personal information to any external company with out your explicit permission.

Fill in more information so that we can get in touch with you faster
Privacy statement: Your privacy is very important to Us. Our company promises not to disclose your personal information to any external company with out your explicit permission.